
The Ultimate Guide to Guilt-Free Sweets: 4 Healthy Eggless Cakes You Can Bake at Home
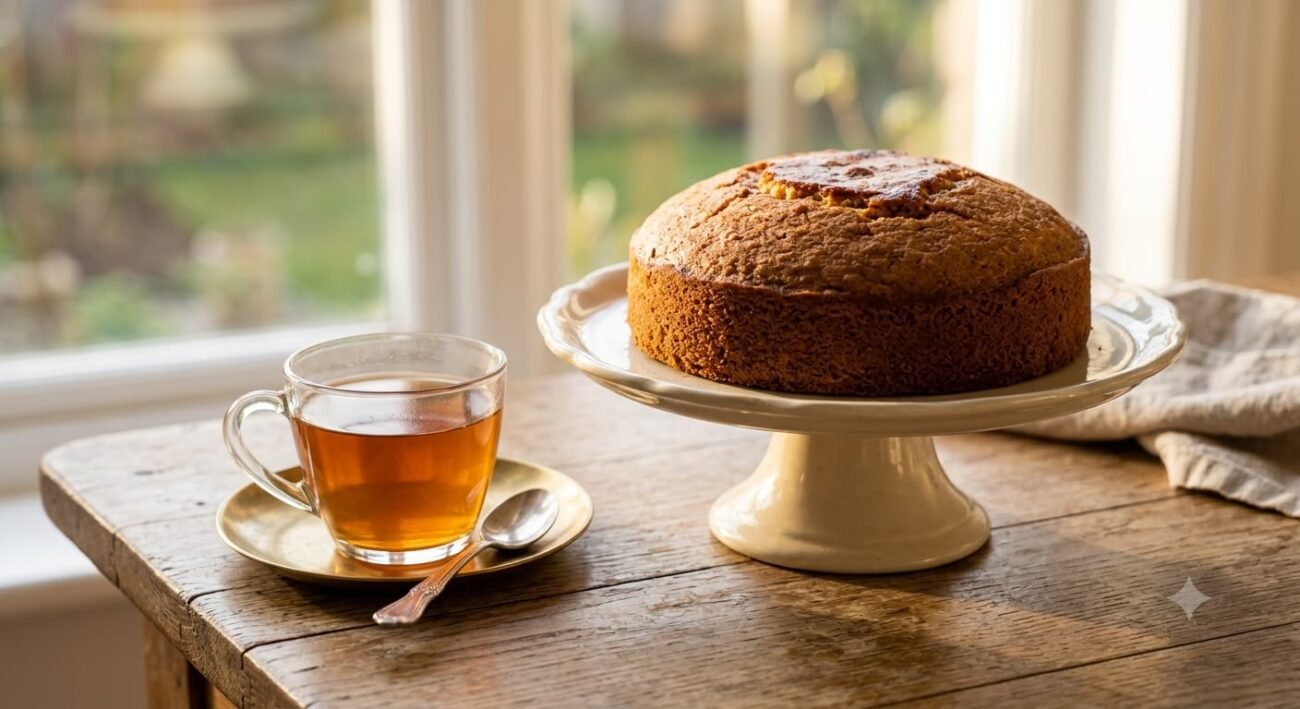
If there is one thing I have learned over the years, it is that you should never have to choose between your health and your happiness. We all know that sudden afternoon craving—the moment you just want to sit down with a hot cup of tea or coffee and enjoy a rich, comforting slice of cake.
For a long time, during my 14 years in the corporate banking world, dealing with the daily target pressures of the collections department, I would reach for whatever sugary, buttery bakery cake was available. It was a quick fix for stress, but it always left me feeling sluggish and guilty afterward. When I transitioned into my true passion as a chef, I knew I had to find a better way. I wanted to create desserts that I could enjoy with my daughter Kangna after a long day of shooting videos, without constantly worrying about empty calories.
I firmly believe in looking at food with love, utilizing what we have in our kitchens, and completely avoiding waste. Healthy baking aligns perfectly with this zero-waste, mindful philosophy. Today, I am sharing a comprehensive guide to baking healthy, eggless cakes at home. I will break down exactly why these cakes are lighter on your waistline, the science behind our ingredient swaps, and four incredibly detailed recipes—including my signature Dates & Walnut Chocolate Cake, plus three more fantastic healthy recipes I have curated from the wonderful world of internet bakers.
Grab your mixing bowls, because we are about to make your kitchen smell amazing! #GetFitWithMeghna
The Calorie Math: Why Are These Cakes Healthier?
Whenever I post a healthy dessert, the first question I get is, “How does this actually save calories?” It is a brilliant question. Let’s break down the nutritional science of why the cakes in this article are significantly better for your body than a standard bakery cake.
A traditional slice of bakery chocolate cake or pound cake clocks in at roughly 350 to 400 calories. The healthy cakes we are discussing today sit right around the 200 to 250 calorie mark per slice. That is a massive saving of 120 to 150 calories every single time you enjoy a piece. But the magic isn’t just in the lower calorie count; it is in the quality of those calories.
1. Eliminating the Butter and Oil
The most significant calorie drop comes from changing our fat source. Butter is essentially pure fat and is incredibly calorie-dense. A standard cake recipe often calls for a whole cup of butter or refined oil. By completely eliminating butter (or reducing oil to a bare minimum) and relying on warm milk, yogurt, or fruit purees (like mashed bananas or churned dates) for moisture, we strip away hundreds of calories of saturated fat. The result? A cake that is just as moist and soft, but physically lighter on your digestive system.
2. Ditching Refined Sugar for Natural Sweetness
Refined white sugar is nothing but empty calories. It offers zero nutritional value and spikes your blood sugar instantly, which tells your body to store fat and leaves you craving a second slice an hour later. In my kitchen, I replace refined sugar with seedless dates, ripe bananas, or organic jaggery powder. While natural sweeteners still contain calories, they bring a heavy dose of dietary fiber, iron, and antioxidants with them. The fiber is crucial—it slows down your digestion, providing a steady release of energy rather than a sudden spike and crash.
3. Swapping Maida for Complex Carbohydrates
This is a detail that often trips people up! Swapping maida (refined all-purpose flour) for whole wheat flour (atta), oats, or ragi doesn’t actually lower the calorie count of the flour itself. Per 100 grams, maida and whole wheat flour have almost the exact same calories. So, why do we swap them?
We swap them for satiety and nutritional density. Maida is stripped of its outer bran, meaning all its fiber is gone. It digests rapidly, acting much like sugar in your bloodstream. Whole wheat flour, oats, and ragi retain their natural fiber, proteins, and minerals. When you eat a cake made from whole grains, the complex carbohydrates take longer for your body to break down. You feel completely satisfied after eating just one slice, meaning you naturally eat less overall.
The Essential Healthy Baking Pantry
Before we dive into the recipes, let’s talk about stocking your pantry. You don’t need fancy, expensive ingredients to bake healthy cakes. You likely have most of these in your kitchen right now.
-
Whole Wheat Flour (Atta) – The everyday staple for our rotis is a fantastic base for rustic, hearty cakes.
-
Oats – Excellent for heart health. You can easily make oat flour at home by pulsing regular rolled oats in a dry grinder until fine.
-
Ragi (Finger Millet) Flour – A powerhouse of calcium and iron. It has an earthy, nutty flavor that pairs beautifully with deep chocolate.
-
Jaggery Powder – An unrefined traditional sweetener that retains its molasses content. It gives bakes a gorgeous, warm caramel flavor.
-
Yogurt (Dahi) – The ultimate egg substitute. When yogurt mixes with baking soda, it creates thousands of tiny carbon dioxide bubbles. This is the secret to getting a soft, airy lift in eggless baking.
-
Seedless Dates & Overripe Bananas – Nature’s candy. I always save bananas that are turning brown and spotty—they are the best natural sweeteners for baking.
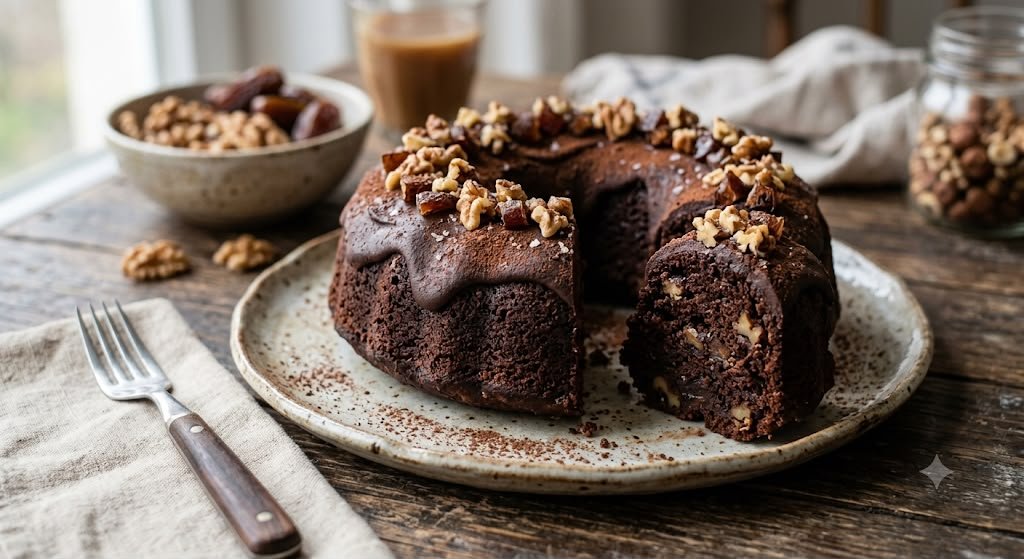
Recipe 1: My Signature Dates & Walnut Chocolate Cake
This is the recipe I turn to when I want a rich, dark chocolate experience without an ounce of guilt. It is completely free of sugar, butter, and maida. The sweetness comes entirely from the dates, and the moisture comes from warm milk.
Ingredients
-
150 gm Seedless Dates
-
1.5 cups Warm Milk
-
1 tsp Instant Coffee (diluted with a spoonful of water)
-
1 cup Whole Wheat Flour (Atta)
-
2 tbsp Unsweetened Cocoa Powder
-
1/2 tsp Baking Powder
-
1 tsp Baking Soda
-
A handful of Roasted Walnuts (roughly chopped)
-
A handful of Choco Chips (optional, for topping)
Method
-
Prepare the Base – Start by soaking the 150 gm of seedless dates in 1.5 cups of warm milk. Let them sit for about 10 to 15 minutes to soften beautifully.
-
Make the Puree – Transfer the soaked dates and milk into a blender and churn the mixture until it transforms into a smooth, luscious date puree. Pour this mixture into a large mixing bowl.
-
Enhance the Chocolate – Add your diluted instant coffee to the bowl. Coffee doesn’t make the cake taste like a latte; instead, it deepens and enhances the cocoa flavor, making it taste like premium dark chocolate. Whisk the wet ingredients well.
-
Sift the Dry Ingredients – Place a fine strainer over your wet mixture. Add the whole wheat flour, cocoa powder, baking powder, and baking soda into the strainer. Sifting is crucial for whole wheat flour—it breaks up lumps and aerates the flour, ensuring your cake isn’t dense.
-
Fold Gently – Strain the dry ingredients directly into the bowl. Using a whisk or a spatula, mix everything together gently. Mix just until you can’t see dry flour anymore. Overmixing develops the gluten in the wheat, making the cake tough.
-
Prepare for Baking – Line a baking loaf pan with parchment paper. Pour the batter in until the pan is about 3/4 full, as it will rise. Generously sprinkle the roasted walnuts and choco chips over the top.
-
Bake –
-
Oven Method – Pre-heat your oven to 180°C for 10 minutes. Bake the cake on the middle rack for 40 minutes, or until a toothpick inserted into the center comes out clean.
-
Stovetop Method – Place a metal stand inside a large, heavy-bottomed vessel (like a Kadai or cooker). Pre-heat this setup on medium heat for 10-15 minutes. Carefully place your cake loaf on the stand, cover the vessel tightly with a lid, and bake for 60 minutes on low to medium heat.
-
-
Cooling – This is the hardest part! Let the cake rest for at least 1 hour before attempting to de-mould it. Eggless, healthy cakes need time to set their structure as they cool. Once cooled, slice and enjoy!
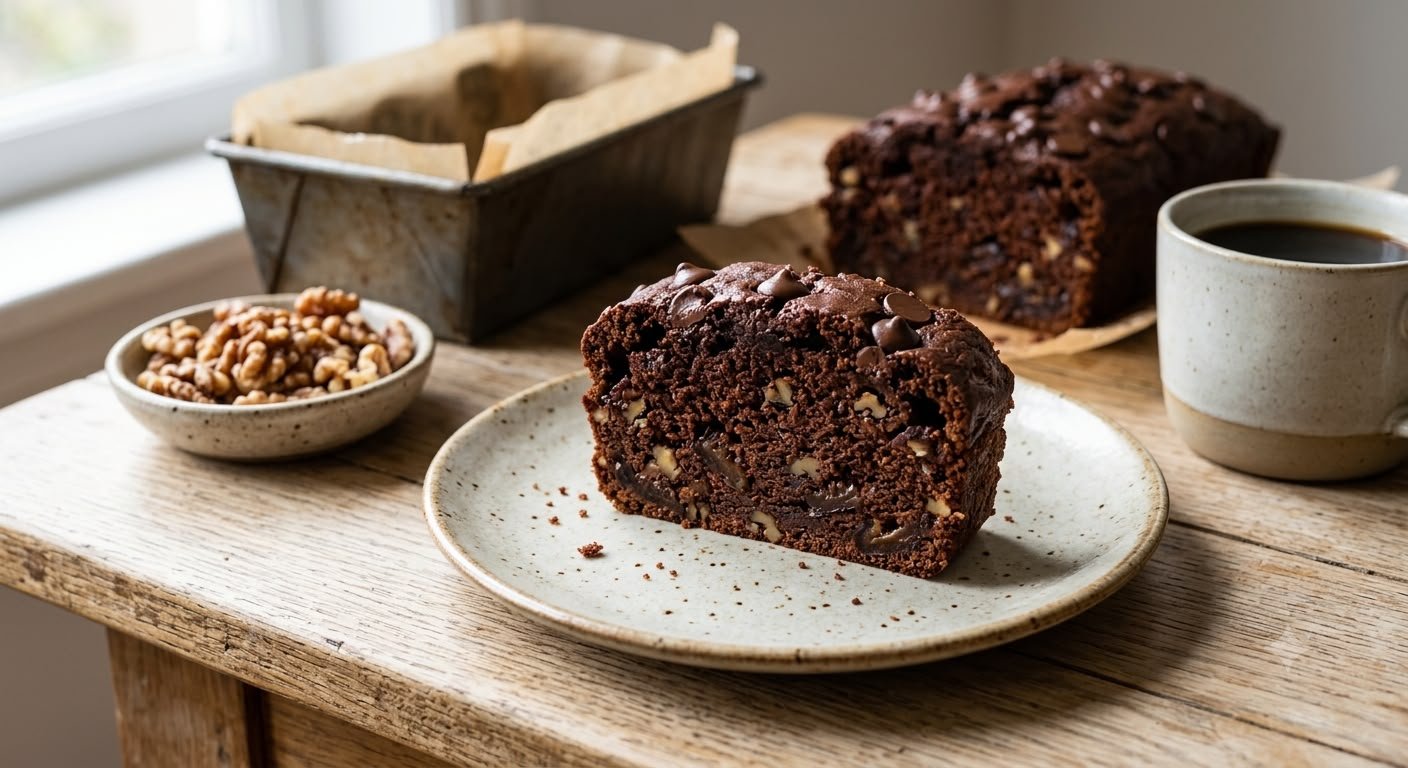
Recipe 2: Classic Eggless Whole Wheat Jaggery Cake
I found variations of this beautiful recipe circulating among mindful baking communities online, and it is a brilliant alternative to basic pound cake. Jaggery (gud) and whole wheat have a natural affinity for each other. This cake is light, spongy, and perfect for your evening chai.
Ingredients
-
1.5 cups Whole Wheat Flour (Atta)
-
3/4 cup Jaggery Powder (ensure it has no hard lumps)
-
1/2 cup Fresh Homemade Yogurt (Curd)
-
1/2 cup Warm Milk
-
1/4 cup Flavorless Oil (like sunflower) or Melted Coconut Oil
-
1 tsp Baking Powder
-
1/2 tsp Baking Soda
-
1 tsp Vanilla Extract (or half a teaspoon of cardamom powder for an Indian touch)
-
Chopped Almonds for garnishing
Method
-
The Foaming Magic – In a large bowl, whisk together the fresh yogurt and the baking soda. Set this aside for 5 minutes. You will see the mixture foam up and increase in volume. This chemical reaction is what will make your eggless cake beautifully spongy!
-
Combine the Wet – Once the yogurt has foamed, add the oil, vanilla extract (or cardamom), and jaggery powder. Whisk vigorously until the jaggery is completely dissolved and the mixture is smooth.
-
Sift the Dry – Place a sieve over the bowl and sift in the whole wheat flour and baking powder.
-
Bring it Together – Gently fold the dry ingredients into the wet mixture. It will look quite thick at this stage. Slowly pour in the warm milk and mix gently until you have a smooth, ribbony batter.
-
Bake – Pour the batter into an 8-inch greased or parchment-lined round cake tin. Sprinkle the top with chopped almonds. Bake in a pre-heated oven at 180°C for 35 to 40 minutes.
-
Serve – Let it cool completely. The caramel notes of the jaggery combined with the toasted almonds are simply heavenly.
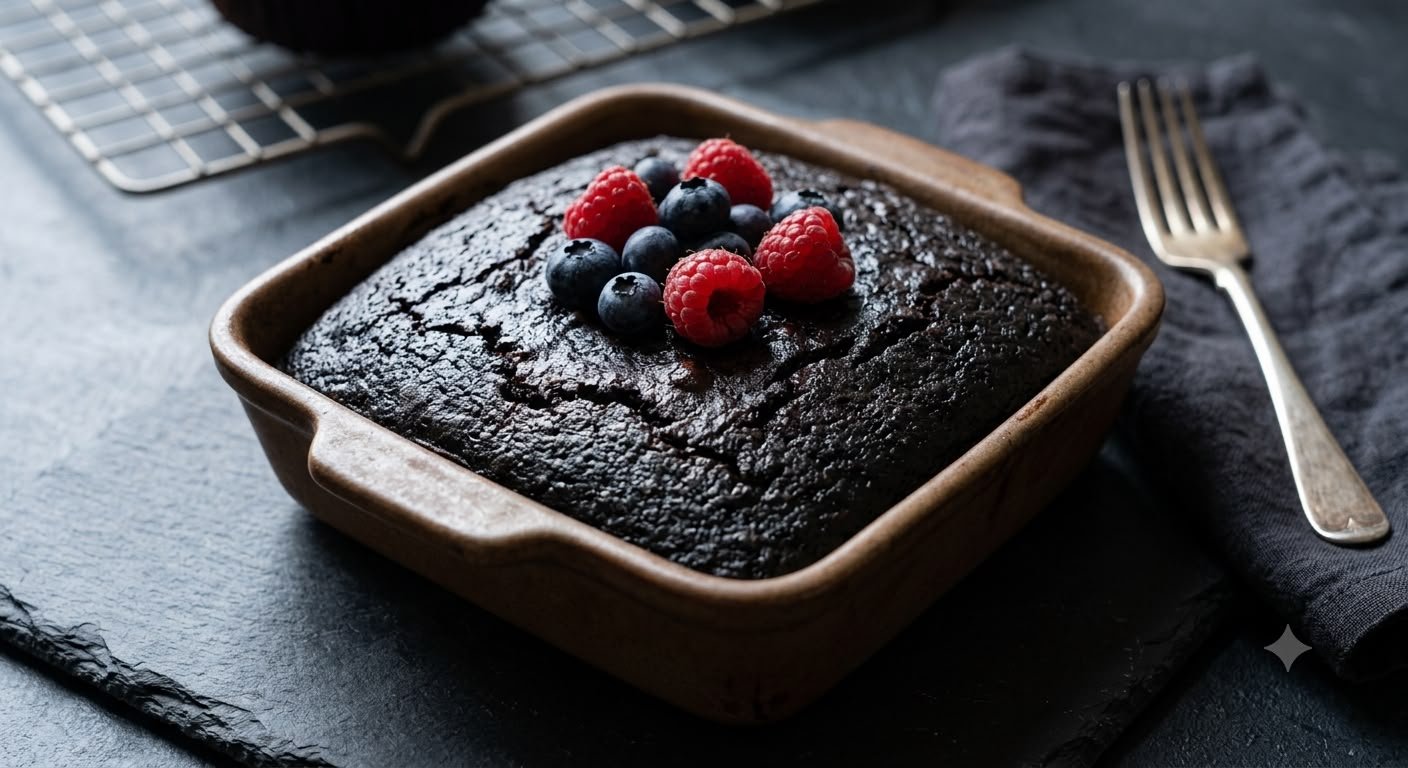
Recipe 3: The Nutrient-Dense Eggless Ragi Chocolate Cake
Ragi (finger millet) is one of the healthiest ancient grains available, packed with calcium, iron, and amino acids. However, its earthy flavor can sometimes be overpowering for beginners. The brilliant trick here, inspired by healthy food bloggers, is masking the ragi with rich cocoa powder and jaggery. You get all the nutrition of millet, but it tastes exactly like a decadent chocolate brownie!
Ingredients
-
1/2 cup Ragi Flour (Nachni)
-
1/2 cup Whole Wheat Flour
-
1/4 cup Unsweetened Cocoa Powder
-
3/4 cup Jaggery Powder
-
1 cup Fresh Yogurt (Curd)
-
1/4 cup Melted Butter or Coconut Oil
-
1/4 cup Warm Milk
-
1 tsp Baking Powder
-
1/2 tsp Baking Soda
-
1 tsp Vanilla Extract
Method
-
Prep the Ragi – For the best flavor, lightly dry roast the ragi flour in a pan on low heat for 3-4 minutes until it smells slightly nutty. Let it cool completely.
-
Activate the Batter – Just like our jaggery cake, start by mixing the yogurt and baking soda in a large bowl. Let it rest for 5 minutes until it becomes frothy and bubbly.
-
Mix the Sweet and Fat – In a separate bowl, vigorously whisk together the jaggery powder and the melted butter (or coconut oil) until smooth. Add the vanilla extract.
-
Combine Wet Ingredients – Pour the jaggery mixture into the foamed yogurt bowl and stir gently.
-
Add the Dry – Place a sieve over your wet ingredients. Sift in the roasted ragi flour, whole wheat flour, cocoa powder, and baking powder. Sifting the cocoa is especially important as it tends to clump.
-
Final Mix – Fold the batter gently. If it feels too tight, add the warm milk to loosen it up into a spreadable consistency.
-
Bake – Transfer to a lined 6-inch or 7-inch cake tin. Bake at 180°C for 30 to 35 minutes.
-
The Result – Because of the ragi, this cake has a slightly denser, fudgier texture than a wheat cake, making it incredibly satisfying. It pairs wonderfully with fresh berries!
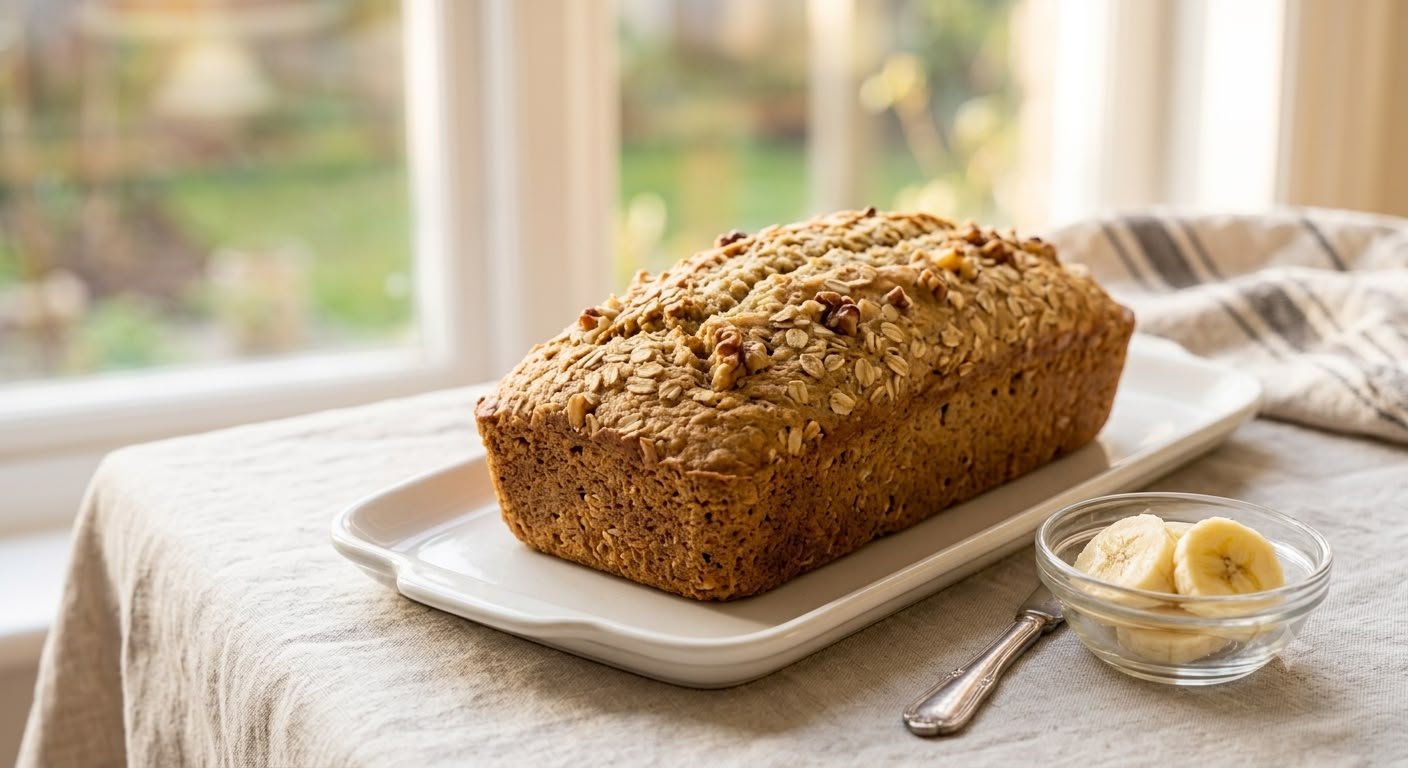
Recipe 4: The Easy Banana Oats Tea Cake
If you have overripe bananas sitting on your kitchen counter, do not throw them away! Overripe, black-spotted bananas are nature’s perfect baking ingredient. They act as a sweetener, a binder, and provide incredible moisture. I love this style of recipe because it brings in oats for heart-healthy fiber.
Ingredients
-
3 Overripe Bananas (mashed well)
-
3/4 cup Oat Flour (just blend regular oats in a mixer until powdered)
-
1 cup Whole Wheat Flour
-
1/2 cup Jaggery Powder or Brown Sugar (reduce to 1/4 cup if your bananas are extremely sweet)
-
1/3 cup Flavorless Oil or Melted Coconut Oil
-
1/4 cup Milk
-
1.5 tsp Baking Powder
-
1/2 tsp Baking Soda
-
1 tsp Cinnamon Powder (cinnamon and banana are best friends!)
-
A pinch of Salt
-
1/4 cup Chopped Walnuts or Pecans
Method
-
Mash the Bananas – In a large bowl, use a fork to mash the overripe bananas until they are completely smooth and almost liquid-like.
-
Add the Wet Ingredients – Whisk the oil, jaggery powder, and milk into the mashed bananas until well combined.
-
Sift and Mix – Sift the whole wheat flour, oat flour, baking powder, baking soda, cinnamon powder, and salt directly into the bowl.
-
Fold the Batter – Gently fold the dry ingredients into the banana mixture. Oat flour absorbs liquid quickly, so don’t overwork the batter. Finally, fold in the chopped walnuts.
-
Bake – Pour the batter into a greased loaf pan. Bake in a preheated oven at 180°C for 40 to 45 minutes. Because bananas hold a lot of moisture, this cake might take a few extra minutes compared to others. Test with a toothpick to ensure the center is fully cooked.
-
Enjoy – This cake is beautifully rustic, fragrant with cinnamon, and tastes even better the next day once the banana flavors have deepened.
Mastering the Art of Healthy Eggless Baking
Baking with alternative flours and without eggs or refined ingredients requires a slightly different approach than standard baking. If you are new to this, keep these crucial rules in mind to ensure your cakes never turn out hard like rocks!
-
Rule 1: Sifting is Non-Negotiable – When you bake with maida, it is already light and airy. Whole wheat, ragi, and oat flours are dense. Sifting them 2 to 3 times incorporates air, breaks up heavy clumps, and is the secret to a fluffy healthy cake.
-
Rule 2: Respect the Foaming Reaction – In many of these recipes, we rely on the chemical reaction between acidic yogurt and alkaline baking soda to act as our “egg”. You must give this mixture 5 minutes to froth up before adding other ingredients. That trapped air is what raises your cake.
-
Rule 3: Never Overmix – This is the number one reason whole wheat cakes become rubbery. When you mix wheat flour with liquids and stir too much, you develop gluten strands. Mix your batter slowly in one direction, just until the dry flour disappears. A few small lumps are perfectly fine!
-
Rule 4: Room Temperature Matters – Make sure your milk and yogurt are at room temperature (or slightly warm) before you begin. Cold milk will instantly seize melted coconut oil or butter, creating unpleasant lumps in your batter that won’t bake evenly.
-
Rule 5: Patience in Cooling – Traditional cakes hold their structure well because of the gluten in maida and the proteins in eggs. Healthy eggless cakes are fragile when hot. You must let them rest in their tins for at least 30 minutes to an hour before trying to remove them, or they will break apart.
Final Thoughts
Baking healthy doesn’t mean eating something that tastes like cardboard. By understanding your ingredients and making smart, mindful swaps, you can create desserts that nourish your body while completely satisfying your cravings. Whether you try my signature Dates & Walnut cake, explore the calcium-rich benefits of Ragi, or utilize your overripe bananas for an oat loaf, you are taking a wonderful step towards better health.
Enjoy your baking journey, and don’t forget to look at your leftovers with love!
Article to publish on a webiste
The Ultimate Guide to Guilt-Free Sweets: 4 Healthy Eggless Cakes You Can Bake at Home
If there is one thing I have learned over the years, it is that you should never have to choose between your health and your happiness. We all know that sudden afternoon craving—the moment you just want to sit down with a hot cup of tea or coffee and enjoy a rich, comforting slice of cake.
For a long time, during my 14 years in the corporate banking world, dealing with the daily target pressures of the collections department, I would reach for whatever sugary, buttery bakery cake was available. It was a quick fix for stress, but it always left me feeling sluggish and guilty afterward. When I transitioned into my true passion as a chef, I knew I had to find a better way. I wanted to create desserts that I could enjoy with my daughter Kangna after a long day of shooting videos, without constantly worrying about empty calories.
I firmly believe in looking at food with love, utilizing what we have in our kitchens, and completely avoiding waste. Healthy baking aligns perfectly with this zero-waste, mindful philosophy. Today, I am sharing a comprehensive guide to baking healthy, eggless cakes at home. I will break down exactly why these cakes are lighter on your waistline, the science behind our ingredient swaps, and four incredibly detailed recipes—including my signature Dates & Walnut Chocolate Cake, plus three more fantastic healthy recipes I have curated from the wonderful world of internet bakers.
Grab your mixing bowls, because we are about to make your kitchen smell amazing! #GetFitWithMeghna
The Calorie Math: Why Are These Cakes Healthier?
Whenever I post a healthy dessert, the first question I get is, “How does this actually save calories?” It is a brilliant question. Let’s break down the nutritional science of why the cakes in this article are significantly better for your body than a standard bakery cake.
A traditional slice of bakery chocolate cake or pound cake clocks in at roughly 350 to 400 calories. The healthy cakes we are discussing today sit right around the 200 to 250 calorie mark per slice. That is a massive saving of 120 to 150 calories every single time you enjoy a piece. But the magic isn’t just in the lower calorie count; it is in the quality of those calories.
- Eliminating the Butter and Oil
The most significant calorie drop comes from changing our fat source. Butter is essentially pure fat and is incredibly calorie-dense. A standard cake recipe often calls for a whole cup of butter or refined oil. By completely eliminating butter (or reducing oil to a bare minimum) and relying on warm milk, yogurt, or fruit purees (like mashed bananas or churned dates) for moisture, we strip away hundreds of calories of saturated fat. The result? A cake that is just as moist and soft, but physically lighter on your digestive system. - Ditching Refined Sugar for Natural Sweetness
Refined white sugar is nothing but empty calories. It offers zero nutritional value and spikes your blood sugar instantly, which tells your body to store fat and leaves you craving a second slice an hour later. In my kitchen, I replace refined sugar with seedless dates, ripe bananas, or organic jaggery powder. While natural sweeteners still contain calories, they bring a heavy dose of dietary fiber, iron, and antioxidants with them. The fiber is crucial—it slows down your digestion, providing a steady release of energy rather than a sudden spike and crash. - Swapping Maida for Complex Carbohydrates
This is a detail that often trips people up! Swapping maida (refined all-purpose flour) for whole wheat flour (atta), oats, or ragi doesn’t actually lower the calorie count of the flour itself. Per 100 grams, maida and whole wheat flour have almost the exact same calories. So, why do we swap them?
We swap them for satiety and nutritional density. Maida is stripped of its outer bran, meaning all its fiber is gone. It digests rapidly, acting much like sugar in your bloodstream. Whole wheat flour, oats, and ragi retain their natural fiber, proteins, and minerals. When you eat a cake made from whole grains, the complex carbohydrates take longer for your body to break down. You feel completely satisfied after eating just one slice, meaning you naturally eat less overall.
The Essential Healthy Baking Pantry
Before we dive into the recipes, let’s talk about stocking your pantry. You don’t need fancy, expensive ingredients to bake healthy cakes. You likely have most of these in your kitchen right now.
Whole Wheat Flour (Atta): The everyday staple for our rotis is a fantastic base for rustic, hearty cakes.
Oats: Excellent for heart health. You can easily make oat flour at home by pulsing regular rolled oats in a dry grinder until fine.
Ragi (Finger Millet) Flour: A powerhouse of calcium and iron. It has an earthy, nutty flavor that pairs beautifully with deep chocolate.
Jaggery Powder: An unrefined traditional sweetener that retains its molasses content. It gives bakes a gorgeous, warm caramel flavor.
Yogurt (Dahi): The ultimate egg substitute. When yogurt mixes with baking soda, it creates thousands of tiny carbon dioxide bubbles. This is the secret to getting a soft, airy lift in eggless baking.
Seedless Dates & Overripe Bananas: Nature’s candy. I always save bananas that are turning brown and spotty—they are the best natural sweeteners for baking.
Recipe 1: My Signature Dates & Walnut Chocolate Cake
This is the recipe I turn to when I want a rich, dark chocolate experience without an ounce of guilt. It is completely free of sugar, butter, and maida. The sweetness comes entirely from the dates, and the moisture comes from warm milk.
Ingredients
150 gm Seedless Dates
1.5 cups Warm Milk
1 tsp Instant Coffee (diluted with a spoonful of water)
1 cup Whole Wheat Flour (Atta)
2 tbsp Unsweetened Cocoa Powder
1/2 tsp Baking Powder
1 tsp Baking Soda
A handful of Roasted Walnuts (roughly chopped)
A handful of Choco Chips (optional, for topping)
Method - Prepare the Base: Start by soaking the 150 gm of seedless dates in 1.5 cups of warm milk. Let them sit for about 10 to 15 minutes to soften beautifully.
- Make the Puree: Transfer the soaked dates and milk into a blender and churn the mixture until it transforms into a smooth, luscious date puree. Pour this mixture into a large mixing bowl.
- Enhance the Chocolate: Add your diluted instant coffee to the bowl. Coffee doesn’t make the cake taste like a latte; instead, it deepens and enhances the cocoa flavor, making it taste like premium dark chocolate. Whisk the wet ingredients well.
- Sift the Dry Ingredients: Place a fine strainer over your wet mixture. Add the whole wheat flour, cocoa powder, baking powder, and baking soda into the strainer. Sifting is crucial for whole wheat flour—it breaks up lumps and aerates the flour, ensuring your cake isn’t dense.
- Fold Gently: Strain the dry ingredients directly into the bowl. Using a whisk or a spatula, mix everything together gently. Mix just until you can’t see dry flour anymore. Overmixing develops the gluten in the wheat, making the cake tough.
- Prepare for Baking: Line a baking loaf pan with parchment paper. Pour the batter in until the pan is about 3/4 full, as it will rise. Generously sprinkle the roasted walnuts and choco chips over the top.
- Bake:
Oven Method: Pre-heat your oven to 180°C for 10 minutes. Bake the cake on the middle rack for 40 minutes, or until a toothpick inserted into the center comes out clean.
Stovetop Method: Place a metal stand inside a large, heavy-bottomed vessel (like a Kadai or cooker). Pre-heat this setup on medium heat for 10-15 minutes. Carefully place your cake loaf on the stand, cover the vessel tightly with a lid, and bake for 60 minutes on low to medium heat. - Cooling: This is the hardest part! Let the cake rest for at least 1 hour before attempting to de-mould it. Eggless, healthy cakes need time to set their structure as they cool. Once cooled, slice and enjoy!
Recipe 2: Classic Eggless Whole Wheat Jaggery Cake
I found variations of this beautiful recipe circulating among mindful baking communities online, and it is a brilliant alternative to basic pound cake. Jaggery (gud) and whole wheat have a natural affinity for each other. This cake is light, spongy, and perfect for your evening chai.
Ingredients
1.5 cups Whole Wheat Flour (Atta)
3/4 cup Jaggery Powder (ensure it has no hard lumps)
1/2 cup Fresh Homemade Yogurt (Curd)
1/2 cup Warm Milk
1/4 cup Flavorless Oil (like sunflower) or Melted Coconut Oil
1 tsp Baking Powder
1/2 tsp Baking Soda
1 tsp Vanilla Extract (or half a teaspoon of cardamom powder for an Indian touch)
Chopped Almonds for garnishing
Method - The Foaming Magic: In a large bowl, whisk together the fresh yogurt and the baking soda. Set this aside for 5 minutes. You will see the mixture foam up and increase in volume. This chemical reaction is what will make your eggless cake beautifully spongy!
- Combine the Wet: Once the yogurt has foamed, add the oil, vanilla extract (or cardamom), and jaggery powder. Whisk vigorously until the jaggery is completely dissolved and the mixture is smooth.
- Sift the Dry: Place a sieve over the bowl and sift in the whole wheat flour and baking powder.
- Bring it Together: Gently fold the dry ingredients into the wet mixture. It will look quite thick at this stage. Slowly pour in the warm milk and mix gently until you have a smooth, ribbony batter.
- Bake: Pour the batter into an 8-inch greased or parchment-lined round cake tin. Sprinkle the top with chopped almonds. Bake in a pre-heated oven at 180°C for 35 to 40 minutes.
- Serve: Let it cool completely. The caramel notes of the jaggery combined with the toasted almonds are simply heavenly.
Recipe 3: The Nutrient-Dense Eggless Ragi Chocolate Cake
Ragi (finger millet) is one of the healthiest ancient grains available, packed with calcium, iron, and amino acids. However, its earthy flavor can sometimes be overpowering for beginners. The brilliant trick here, inspired by healthy food bloggers, is masking the ragi with rich cocoa powder and jaggery. You get all the nutrition of millet, but it tastes exactly like a decadent chocolate brownie!
Ingredients
1/2 cup Ragi Flour (Nachni)
1/2 cup Whole Wheat Flour
1/4 cup Unsweetened Cocoa Powder
3/4 cup Jaggery Powder
1 cup Fresh Yogurt (Curd)
1/4 cup Melted Butter or Coconut Oil
1/4 cup Warm Milk
1 tsp Baking Powder
1/2 tsp Baking Soda
1 tsp Vanilla Extract
Method - Prep the Ragi: For the best flavor, lightly dry roast the ragi flour in a pan on low heat for 3-4 minutes until it smells slightly nutty. Let it cool completely.
- Activate the Batter: Just like our jaggery cake, start by mixing the yogurt and baking soda in a large bowl. Let it rest for 5 minutes until it becomes frothy and bubbly.
- Mix the Sweet and Fat: In a separate bowl, vigorously whisk together the jaggery powder and the melted butter (or coconut oil) until smooth. Add the vanilla extract.
- Combine Wet Ingredients: Pour the jaggery mixture into the foamed yogurt bowl and stir gently.
- Add the Dry: Place a sieve over your wet ingredients. Sift in the roasted ragi flour, whole wheat flour, cocoa powder, and baking powder. Sifting the cocoa is especially important as it tends to clump.
- Final Mix: Fold the batter gently. If it feels too tight, add the warm milk to loosen it up into a spreadable consistency.
- Bake: Transfer to a lined 6-inch or 7-inch cake tin. Bake at 180°C for 30 to 35 minutes.
- The Result: Because of the ragi, this cake has a slightly denser, fudgier texture than a wheat cake, making it incredibly satisfying. It pairs wonderfully with fresh berries!
Recipe 4: The Easy Banana Oats Tea Cake
If you have overripe bananas sitting on your kitchen counter, do not throw them away! Overripe, black-spotted bananas are nature’s perfect baking ingredient. They act as a sweetener, a binder, and provide incredible moisture. I love this style of recipe because it brings in oats for heart-healthy fiber.
Ingredients
3 Overripe Bananas (mashed well)
3/4 cup Oat Flour (just blend regular oats in a mixer until powdered)
1 cup Whole Wheat Flour
1/2 cup Jaggery Powder or Brown Sugar (reduce to 1/4 cup if your bananas are extremely sweet)
1/3 cup Flavorless Oil or Melted Coconut Oil
1/4 cup Milk
1.5 tsp Baking Powder
1/2 tsp Baking Soda
1 tsp Cinnamon Powder (cinnamon and banana are best friends!)
A pinch of Salt
1/4 cup Chopped Walnuts or Pecans
Method - Mash the Bananas: In a large bowl, use a fork to mash the overripe bananas until they are completely smooth and almost liquid-like.
- Add the Wet Ingredients: Whisk the oil, jaggery powder, and milk into the mashed bananas until well combined.
- Sift and Mix: Sift the whole wheat flour, oat flour, baking powder, baking soda, cinnamon powder, and salt directly into the bowl.
- Fold the Batter: Gently fold the dry ingredients into the banana mixture. Oat flour absorbs liquid quickly, so don’t overwork the batter. Finally, fold in the chopped walnuts.
- Bake: Pour the batter into a greased loaf pan. Bake in a preheated oven at 180°C for 40 to 45 minutes. Because bananas hold a lot of moisture, this cake might take a few extra minutes compared to others. Test with a toothpick to ensure the center is fully cooked.
- Enjoy: This cake is beautifully rustic, fragrant with cinnamon, and tastes even better the next day once the banana flavors have deepened.
Mastering the Art of Healthy Eggless Baking
Baking with alternative flours and without eggs or refined ingredients requires a slightly different approach than standard baking. If you are new to this, keep these crucial rules in mind to ensure your cakes never turn out hard like rocks!
Rule 1: Sifting is Non-Negotiable. When you bake with maida, it is already light and airy. Whole wheat, ragi, and oat flours are dense. Sifting them 2 to 3 times incorporates air, breaks up heavy clumps, and is the secret to a fluffy healthy cake.
Rule 2: Respect the Foaming Reaction. In many of these recipes, we rely on the chemical reaction between acidic yogurt and alkaline baking soda to act as our “egg”. You must give this mixture 5 minutes to froth up before adding other ingredients. That trapped air is what raises your cake.
Rule 3: Never Overmix. This is the number one reason whole wheat cakes become rubbery. When you mix wheat flour with liquids and stir too much, you develop gluten strands. Mix your batter slowly in one direction, just until the dry flour disappears. A few small lumps are perfectly fine!
Rule 4: Room Temperature Matters. Make sure your milk and yogurt are at room temperature (or slightly warm) before you begin. Cold milk will instantly seize melted coconut oil or butter, creating unpleasant lumps in your batter that won’t bake evenly.
Rule 5: Patience in Cooling. Traditional cakes hold their structure well because of the gluten in maida and the proteins in eggs. Healthy eggless cakes are fragile when hot. You must let them rest in their tins for at least 30 minutes to an hour before trying to remove them, or they will break apart.
Final Thoughts
Baking healthy doesn’t mean eating something that tastes like cardboard. By understanding your ingredients and making smart, mindful swaps, you can create desserts that nourish your body while completely satisfying your cravings. Whether you try my signature Dates & Walnut cake, explore the calcium-rich benefits of Ragi, or utilize your overripe bananas for an oat loaf, you are taking a wonderful step towards better health.
Enjoy your baking journey, and don’t forget to look at your leftovers with love!
Love M

